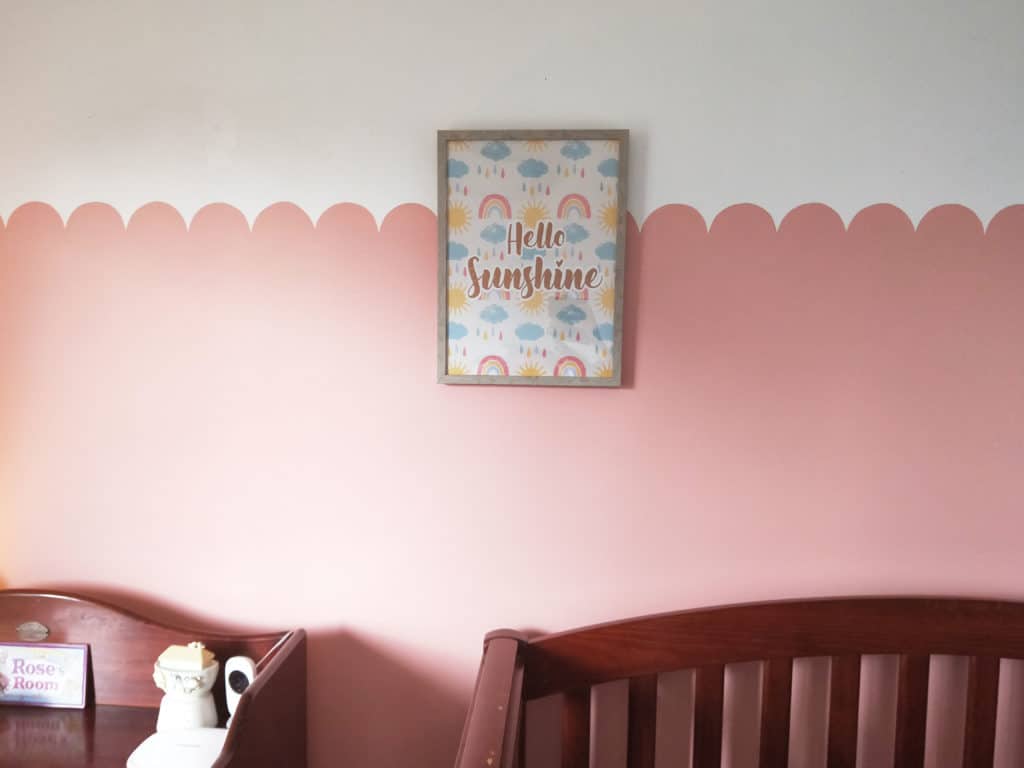
My daughter is all ready for her own room, so I had the exciting task of decorating it for her! I decided to paint the wall with a scalloped edge to add some fun. Below you can find a DIY step-by-step guide on how you can achieve the scalloped wall look on a budget. It’s easier than you think!
What is a scalloped design?
A scalloped design is based on a scallop shell. It features a row of arcs repeated. Think of the pattern on a mermaid’s tail. The scalloped edge has become a trend in wall paint design as it adds a fun twist to a wall border, perfect for nursery’s, playrooms and kid’s bedrooms.
Choosing your paint
To calculate the amount of paint required, firstly I needed to decide how far up the wall I wanted the scalloped edge to be. The ceiling height in the bedroom was 2.4m and I wanted the paint effect to be about 2/3rds of the way up the wall so I decided to have the scallops at 1.6m high. The wall length is 3m so the area was around 3mx1.6m=4.8m2.
Armed with this information, I was able to go to the hardware store and bought a 500ml tester pot of the Coral Vista colour I wanted. This would cover the area I needed with 2 coats and only cost $9.35! Bargain.
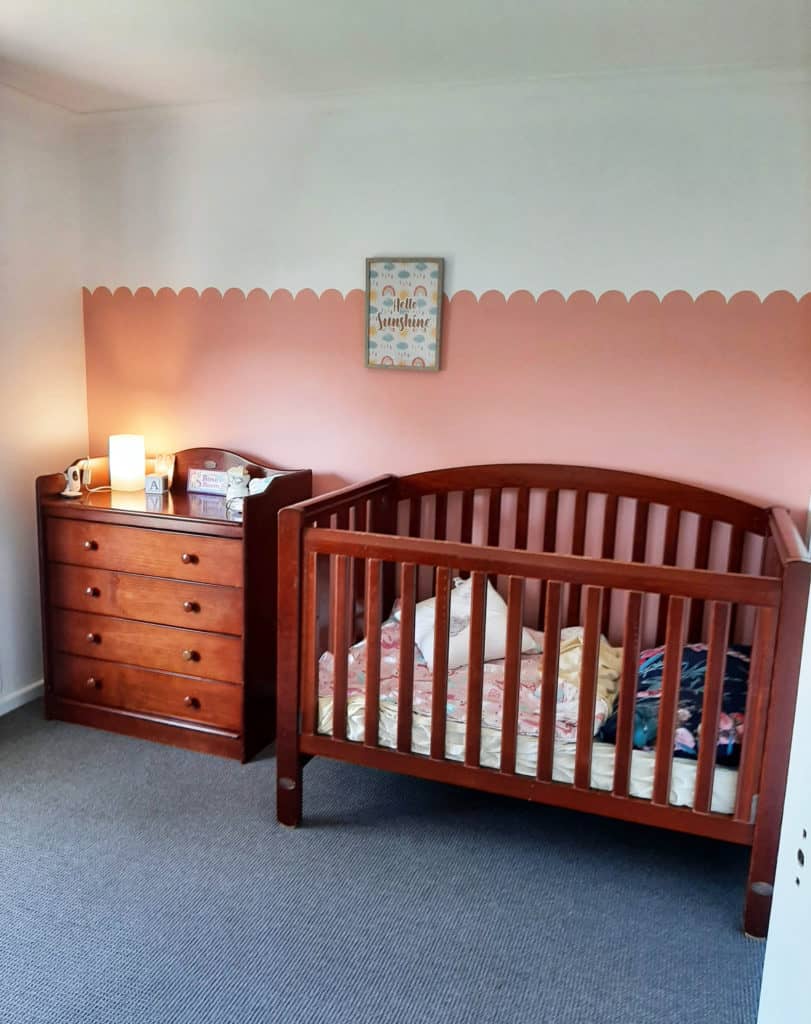
I chose to only paint one feature wall and leave the other walls white (Dulux Lexicon Quarter). For the feature wall, I chose Taubmans Coral Vista as an alternative to pink and it has created a warm and cosy feel with a girly vibe.
Equipment
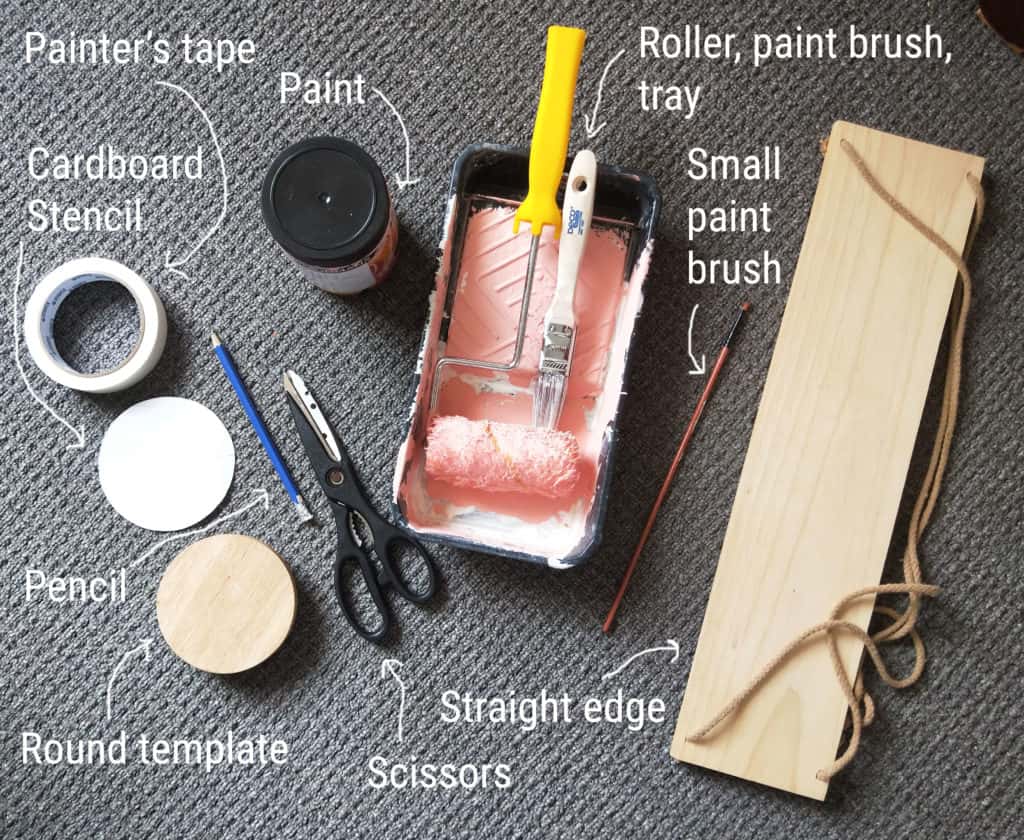
- Pencil
- Scissors (to cut stencil)
- Cardboard
- Something round to trace around
- Straight edge (i.e., ruler, spirit level, piece of wood, etc)
- Paint brush
- Small paint brush for painting the scallops
- Your choice of paint
- Paint roller and tray
Step-by-step guide
Step 1
The first step is to decide how high up the wall you want the scalloped edge to be. Using a tape measure, lightly mark a few dashes at the height you want along the wall and then draw a faint line across using a straight edge.
Step 2
Using something round as a guide (I used a lid of a Kmart canister, but you can use something larger or smaller depending on how you want the scallops to be), trace around this on to a piece of cardboard. Cut out the stencil using scissors. Draw a line through the centre of the circle stencil. This is your guide to line up with the line on the wall.
Step 3
Start in the corner and align the center line on the cardboard stencil up with the line on the wall. Lightly trace around half of the circle on the wall.
Step 4
Move the circle stencil along the wall, tracing around it as you go. Keep moving along until you get to the other corner. It doesn’t matter if there is not space for a full scallop at the end, you can bend the cardboard stencil in to the corner.
Step 5
Use painter’s tape to tape up the skirting boards and edges of the walls where you don’t want to paint.
Step 6
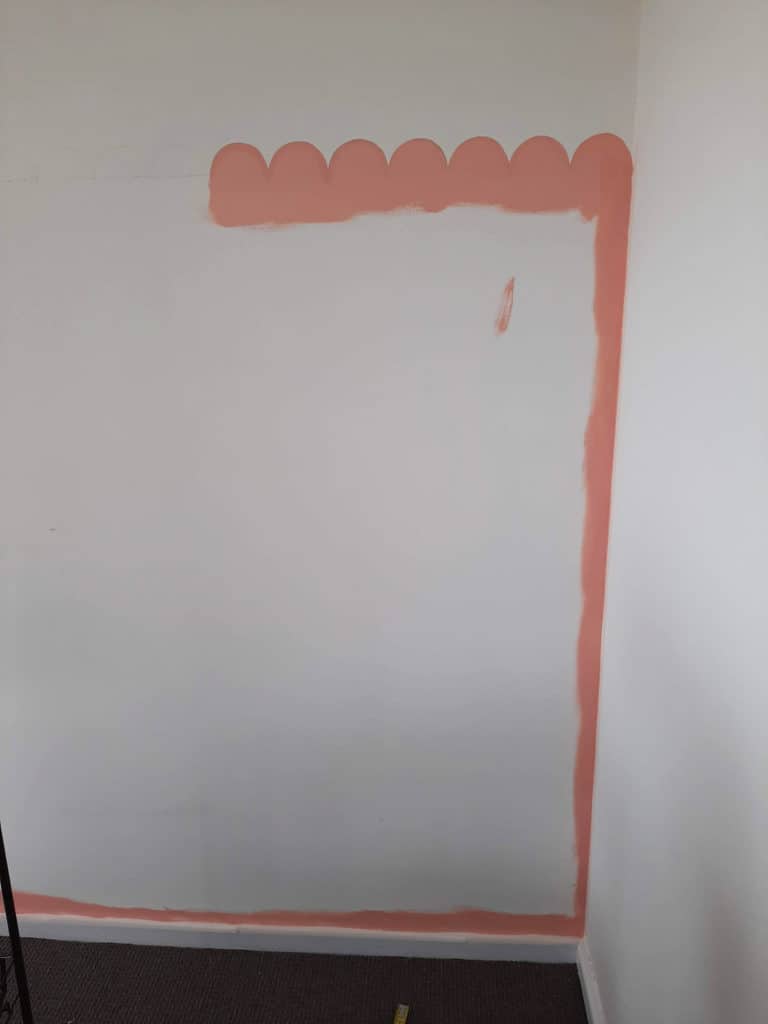
Cut in with the paint brush in the paint colour you’ve chosen. When it comes to the scalloped edge, use the smaller paint brush to get a neater finish.
Step 7
Use a roller to fill in the wall. Make sure you go a little way into the scallops to cover the pencil line and avoid an obvious line along the wall.
Step 8
Leave to dry (around 2 hours). Then do a second coat. Remove tape when the paint is still wet to avoid it peeling the paint off.
Step 9
Ta-dah! You have a beautiful, scalloped edge wall.
You might also like...
Interior Design Trends in 2023
In interiors, 2023 brings earthy tones, textured walls, and classical decoration. Sustainability...
Read MoreDIY Home Decor Project: How to replace a fly screen
An easy DIY project, you can replace your fly screen in a...
Read MoreWhat is a granny flat and is it a good investment?
A granny flat is a self-contained unit located on the same block...
Read MorePopular Interior Design Trends in 2022
2022 is all about cosiness, comfortability, and longevity. After the last few...
Read More